Our scenario:
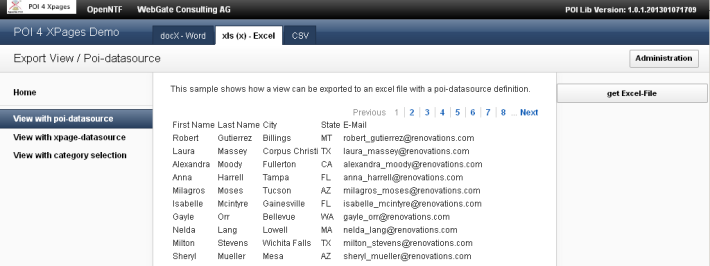
You have built a beautiful web application where you list all your contacts on a page. Although the contacts can be accessed online some users request an export to excel:
To fullfill this request do the following steps:
Let’s begin with some coding:
1. Prepare your Excel file and a export view.
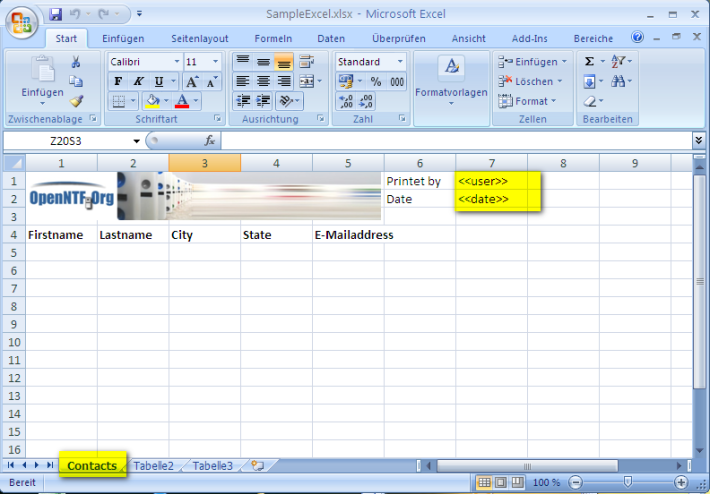
We have highlighted several things on the screenshot.
- <<user>> <<date> are placehoders. They will be replaced with some calculated values
- Contacts is the name of the spreadsheet
- The export should start on row 5
Our export view looks like this. Keep the column titles in mind, as we are going to use them for the column definition of our export:
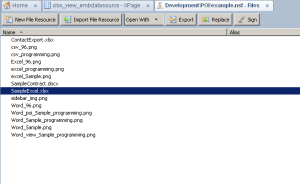
Save your Excel template and insert it as a FileResource to the appliction
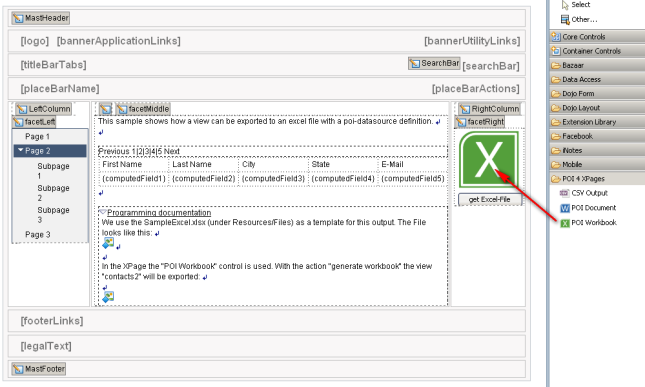
2. Open the XPage on which the export should be performed.
Add the ‘Poi Workbook’ control to the Page
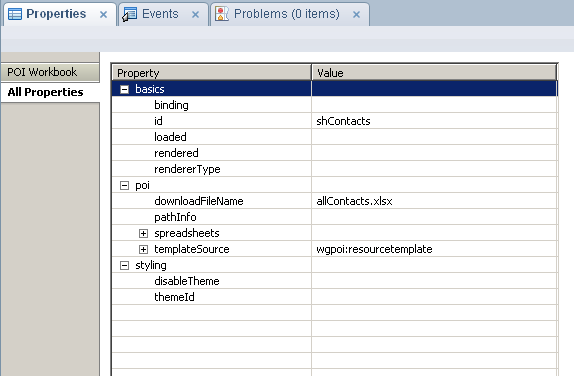
Select the POI Workbook control and switch to the properties panel. It’s time to configure the export.
- downloadFileName =specifies the name of the created file
Add a templateSource to the element. The template source defines which excel file will be used. You can choose between “resourcetemplate” (a resourcefile) or “attachmenttemplate” (a attachment in a document from a defined database).
In this example we use ‘resourcetemplate’
- databaseName: The database where the resource file is saved, empty means the current database
- filename: The name of the resource file
As a next step we define the spreadsheet. The spreadsheet represents a sheet in a workbook:
- name: The name of the spreadsheet on the workbook
- create: if yes is selected, the spreadsheet will be created if it doesn’t exist. Otherwise the spreadsheet definition will be ignored.
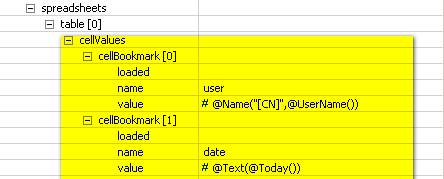
It’s time to define some cellValues. Remember the <<user>> and <<date>> values on the sheet. We will now set the values for these fields:
With the definition of the cellBookmark all the <<user>> and <<date>> tags on the spreadsheet (not within the whole workbook) will be replaced with the specified values during the export.
Be aware that you have to write ‘user’ instead of ‘<<user>>’ for the cellBookmark name.
So, the configuration of the excel file is done and we can now proceed to export our view. Therefore we define an ‘exportDefinition’
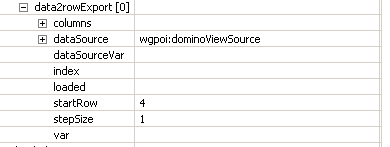
We can choose between data2rowexport and data2columnexport which represents the export direction.
- startRow: 0 based. Defines the row where the export should start
- stepSize: 1 or higher. It’s possible to export a dataset to 1, 2 or more rows. (see columns for how to assign an other row)
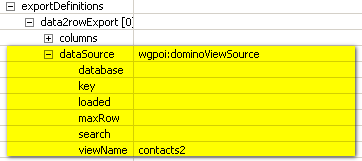
Assign the dataSource:
- database: define the database which has to be used, empty means the current database
- key: works like getAllDocumentsByKey
- maxRow: the maximum (currently 1’500 entries) of entries to export
- search: a fulltext search query
- viewName: the name of the view to export
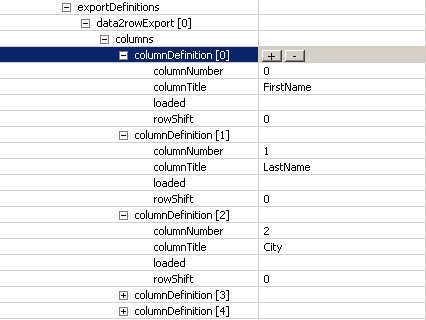
Assign the columns:
Each column needs a columnDefinition.
- columnNumber: the number of the column (0 based)
- columnTitle:he title of the column in the datasource (if you use a ListObjectDataSource the columnTitle will be invoked with “get<NAME>” on the object in the list)
- rowShift:this defines how many rows down the value should be shifted (multiple row export per dataset)
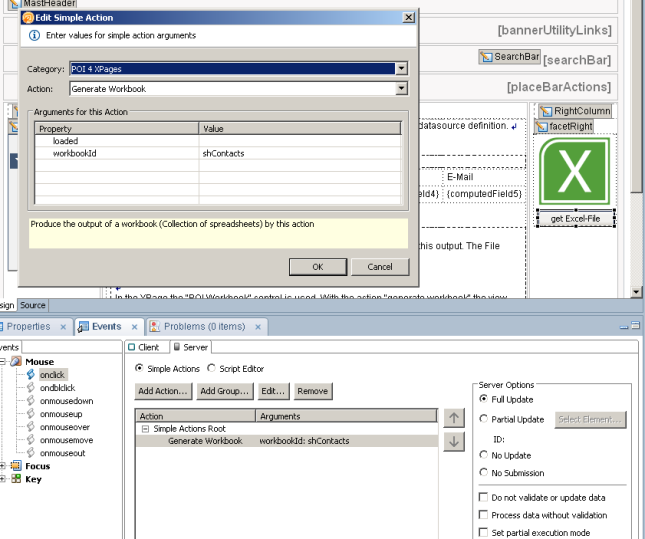
Now everything is defined. Let us export the excel file by button. The button needs an “onClick()” eventhandler like this:
Choose “Generate Workbook” and select the ID of workbook definition.
Test it and have fun!
